Build a NextJS Application with Nile
In this quick tutorial, you will learn about Nile's tenant virtualization features, while building a todo list application with NextJS 13.
1. Create a database
- Sign up for an invite to Nile if you don't have one already
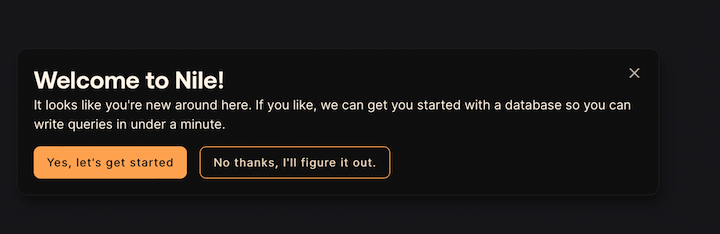
- You should see a welcome message. Click on "Lets get started"
- Give your workspace and database names, or you can accept the default auto-generated names. In order to complete this quickstart in a browser, make sure you select to “Use Token in Browser”.
2. Create a table
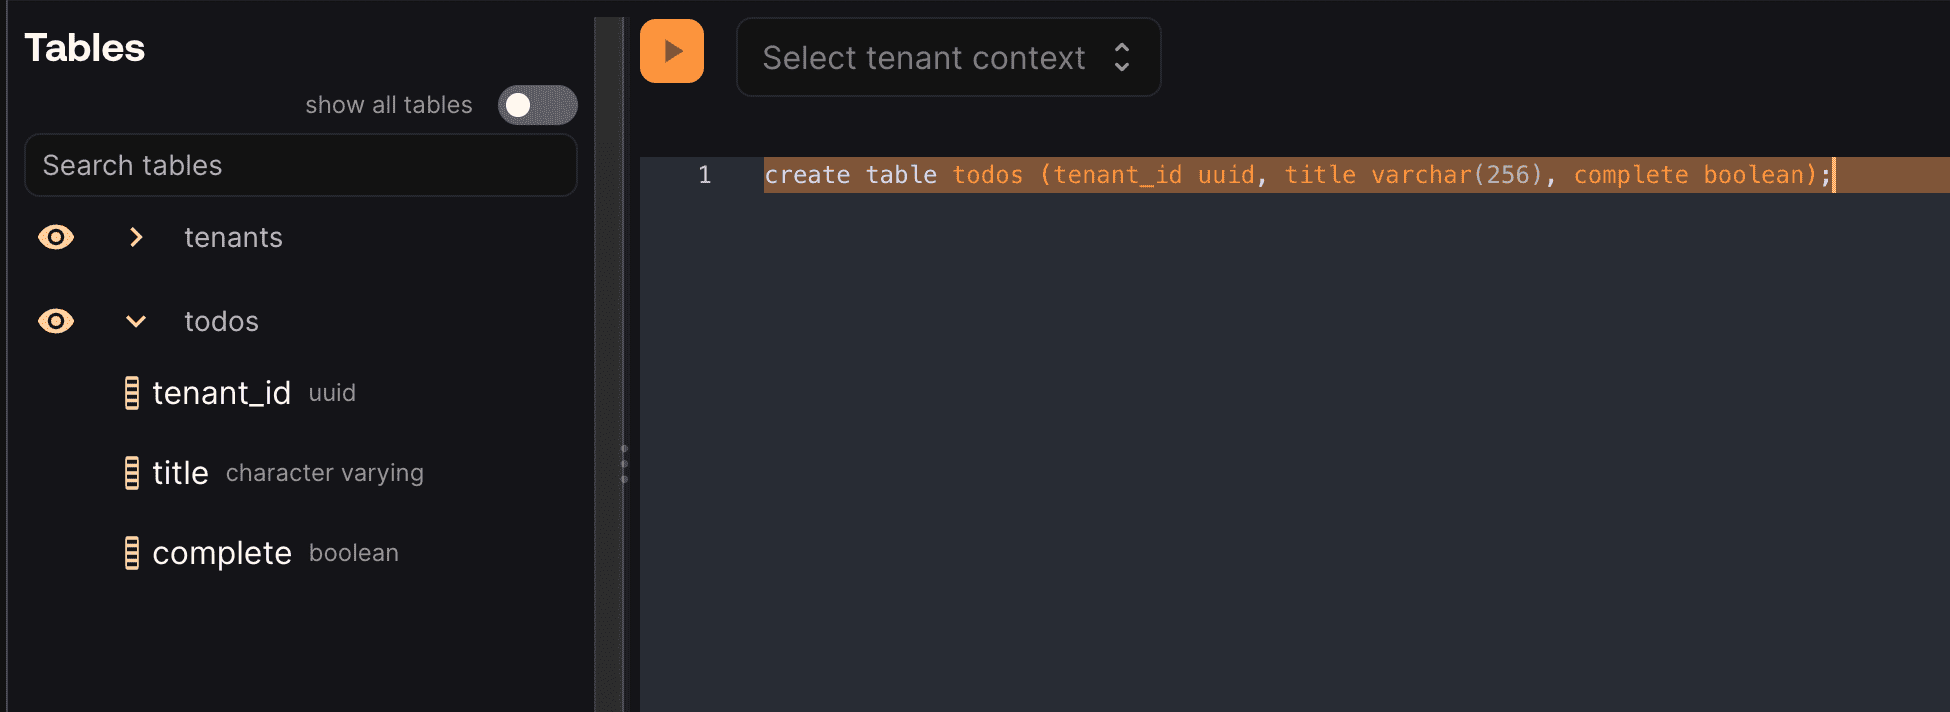
After you created a database, you will land in Nile's query editor. Since our application requires a table for storing all the "todos" this is a good time to create one:
create table todos (
    id uuid DEFAULT (gen_random_uuid()),
    tenant_id uuid,
    title varchar(256),
    complete boolean);
You will see the new table in the panel on the left side of the screen, and you can expand it to view the columns.
See the tenant_id column? By specifying this column, You are making the table tenant aware. The rows in it will belong to specific tenants. If you leave it out, the table is considered shared, more on this later.
3. Get credentials
In the left-hand menu, click on "Settings" and then select "Credentials". Generate credentials and keep them somewhere safe. These give you access to the database.
4. Set the environment
Enough GUI for now. Let's get to some code.
If you haven't cloned this repository yet, now will be an excellent time to do so.
git clone https://github.com/niledatabase/niledatabase
cd niledatabase/examples/quickstart/nextjs
Rename .env.local.example to .env.local, and update it with your workspace and database name.
(Your workspace and database name are displayed in the header of the Nile dashboard.)
Also fill in the username and password with the credentials you picked up in the previous step.
It should look something like this:
# Client (public) env vars

# the URL of this example + where the api routes are located
# Use this to instantiate Nile context for client-side components
NEXT_PUBLIC_BASE_PATH=http://localhost:3000/api
NEXT_PUBLIC_WORKSPACE=todoapp_demo
NEXT_PUBLIC_DATABASE=demo_db_nextjs_qs

# Private env vars that should never show up in the browser
# These are used by the server to connect to Nile database
NILE_DB_HOST = "db.thenile.dev"
NILE_USER = "018ad484-0d52-7274-8639-057814be60c3"
NILE_PASSWORD = "0d11b8e5-fbbc-4639-be44-8ab72947ec5b"

# The URL of the Nile API
# Use this to instantiate Nile Server context for server-side use of the api SDK
NEXT_PUBLIC_NILE_API=https://api.thenile.dev

# Uncomment if you want to try Google Auth
# AUTH_TYPE=google
Install dependencies
npm install
5. Run the application
npm run dev
💡 Note: This example only works with Node 18 and above. You can check the version with node -v.
Open http://localhost:3000 with your browser to see the result.
If all went well, your browser should show you the first page in the app, asking you to login or sign up.
After you sign up as a user of this example app, you'll be able to see this user by going back to Nile Console and looking at the users table
select * from users;
Login with the new user, and you can create a new tenant and add tasks for the tenant. You can see the changes in your Nile database by running
select tenants.name, title, complete from
tenants join todos on tenants.id=todos.tenant_id;
7. How does it work?
There are a few moving pieces here, so let's break it down.
This example uses NextJS app router, so the application landing page is in app/page.tsx.
You can see the user authentication components <GoogleAuthPanel /> and <BasicLoginForm /> there.
If you are interested in learning how to use Nile for authentication, check out the authentication tutorials.
This explanation will focus on creating tenants, selecting tenants and adding tasks.
7.1. Configuring Nile SDK
All the signup and login methods eventually route users to /tenants. You'll find the code in app/tenants/page.tsx.
The first thing we do in this page is to configure Nile SDK for the current user:
configureNile(cookies().get("authData"), null);
This method configures a shared instance of nile that is used throughout the application.
This instance is a singleton, which you get by calling Nile SDK's Server method, which we are doing in '@/lib/NileServer'
This is also where all the environment variables we've set earlier are being used, so lets take a look at this file:
const nile =  Server(
        ...
        api: {
          basePath: String(process.env.NEXT_PUBLIC_NILE_API),
        },
        ...);
The basePath configuration is the URL that nile.api methods will call. This component calls Nile APIs directly, and therefore we set basePath to NEXT_PUBLIC_NILE_API.
Note that there are other components, for example basic login and signup that for web security reasons cannot call Nile APIs directly. Instead, they should call the application server, which in turn calls Nile APIs. In this case, the basePath should be set to NEXT_PUBLIC_BASE_PATH.
So every page, route and function in our app can use the same nile instance to access Nile APIs and DB.
But, we need to make sure we are using the right user and tenant context.
So we call configureNile and pass in the cookies and the tenant ID.
After this point, we can use nile to access the database and APIs, and it will use the right user and tenant context.
7.2 Listing tenants
Next thing we do in app/tenants/page.tsx is to list all the tenants for the current user.
We use Nile SDK to query the database for all the tenants that the current user is a member of:
tenants = await db("tenants")
  .select("tenants.id", "tenants.name")
  .join("users.tenant_users", "tenants.id", "=", "tenant_users.tenant_id")
  .where("tenant_users.user_id", "=", nile.userId);
and then we render the list of tenants as a list of links:
<List variant="outlined">
  {tenants.map((tenant: any) => (
    <ListItem key={tenant.id}>
      <ListItemButton component={NextLink} href={`/tenants/${tenant.id}/todos`}>
        {tenant.name}
      </ListItemButton>
    </ListItem>
  ))}
</List>
It looks a bit like magic, but NextJS server fetching and Nile SDK are integrated together to make this happen.
7.3 Creating a tenant
When you click on the "Create Tenant" button, we pop out a modal form. The form is defined in app/tenants/add-form.tsx and uses NextJS server actions.
Create tenant logic is in app/tenants/tenant-actions.tsx.
In createTenant method, we use Nile SDK to create a new tenant and link it to the current user.
  configureNile(cookies().get('authData'), null); // we don't have a tenant yet

  let tenantID = null;
  try {
    const createTenantResponse = await nile.api.tenants.createTenant({
      name: tenantName,
    });
  }
This call inserts a new tenant to tenants table, and also inserts a new row to tenant_users table, linking the current user to the new tenant.
You can see the new tenant in the Nile console by running select * from tenants.
By setting nile.token = userToken we are telling Nile SDK to use the user's token to make the API call. This is important, since Nile uses this token to both validate the user's identity and to link the tenant with this user.
7.4 Listing tasks
When you create a tenant or select an existing tenant, you are taken to the tenant's todo list.
The code for this page is in app/tenants/[tenantid]/todos/page.tsx.
We could have used the same logic to list todos for a tenant as we did for listing tenants for a user, but we wanted to show you a different way to do this.
Instead of using SQL where clauses to get only todos for this specific tenant, we are relying on Nile's tenant isolation feature:
configureNile(cookies().get("authData"), params.tenantid);
// no need for where clause because we previously set Nile context
const todos = await nile.db("todos").select("*");
Note that this time we are configuring Nile with the tenant ID too. Previously we only used the user because there was no tenant yet. Then we run a simple SQL query to get all the todos.
Behind the scenes, Nile does two things:
- Check that the user is a member of the tenant and indeed has access to these todos
- Apply tenant isolation and execute the query in a "virtual tenant DB".
This also means that you don't need to implement the 3-way join between todo, tenants and tenant_users, so the code is simpler and more performant.
7.5 Adding a task
When you click on the "+" to add a new task or on the checkbox to mark it as done, we again rely on NextJS server actions to make things simple.
You can find the logic for adding a task in app/tenants/[tenantid]/todos/todo-actions.tsx.
As you can see, we again use the tenant context to insert the new task:
configureNile(cookies().get("authData"), tenantId);
await nile
  .db("todos")
  .insert({ tenant_id: nile.tenantId, title: title, complete: false });
or update an existing one:
configureNile(cookies().get("authData"), tenantId);
await nile.db("todos").update({ complete: complete }).where({ title: title });
By setting the context, Nile will validate that the user indeed has permission to add tasks for this tenant, and will make sure we only update tasks for the current tenant.
We don't want just anyone handing us tasks and telling us to do them, right?
8. What's next?
This example is a good starting point for building your own application with Nile.
You have learned basic Nile concepts and how to use them with Nile SDK and NextJS.
You can learn more about Nile's tenant virtualization features in the following tutorials:
And you can explore Nile's JS SDK in the SDK reference.